Bot Testing Framework
Using this frame work we can be able to generate test flows using web UI or Command Line Interface and we can be able to test these flow using flowId.
Getting Started
These instructions will get you a copy of the project up and running on your local machine for development and testing purposes. See deployment for notes on how to deploy the project on a live system.
Prerequisites
The things you need to install the software and how to install them
Node Modules used in this project
- nock : for mocking facebook server
- bluebird : for Promise
- body-parser : for request parsing
- bunyan : for logging appLogging and test Logging
- chai : assertion library for node
- ejs : simple templating language that lets you generate HTML markup with plain JavaScript.
- express : minimal and flexible Node.js web application framework that provides a robust set of features to develop web and mobile applications.
- mocha : test framework
- request : to make http request
- showdown : to generate HTML from markdown(README.md)
- socket.io : to enable real-time bidirectional event-based communication.
Flow of Diagram of Bot testing

Installing
copy this module in root folder of your project.
lets assume your project folder is $myProject i will be refferring it later
you can configure following files according to your project
1. configuring testConf
$myProject/botTesting/conf/testConf.js
- the following required Params you can configure in testConf.js
- fbUrl = “https://graph.facebook.com”; # base url of facebook
- fbMessageEndPoint = “/v2.6/me/messages”; # end point where your app is sending messages to facebook
- appBaseUrl = “http://127.0.0.1:5000”; # your appServer baseUrl
- webhookUrl = “http://127.0.0.1:5000/webhook/fb/:appId”; # your webhookUrl of botProject
- fbTestDataFile = “”; # we will be setting it at runtime to $myProject/botTesting/src/test_data/fbTestData.json
- fbSecretKeyByAppId = {“appId”:”Token”}; # if you are verifying request from facebook in your botProject add appId and secret token here
2. Entry point for starting web test Server (where you can generate and test flows)
$myProject/botTesting/src/test.js
- you can set node environment variable accordingly here which may be needed for your botProject (appServer) like configuration file path and logs Say what the step will be
3. you can edit what to test in responses from bot
$myProject/botTesting/src/fb_test/fbTest.js
- you can edit testResponse function
function testResponse(botResponse, savedResponse) {
  // all tests
}
4. Starting testWebServer
-
got to botTesting directory and run below command
$myProject/botTesting$ LOG_TO_FILE=true npm run webTest
make sure you are not using proxy in terminal
to check proxy run echo $https_proxy $https_proxy
if you got something remove proxy by running export https_proxy= and export https_proxy=
Generation Of testData and testing of testData from web UI
start the testServer as explained above and head to http://127.0.0.1:8888/web
The web UI
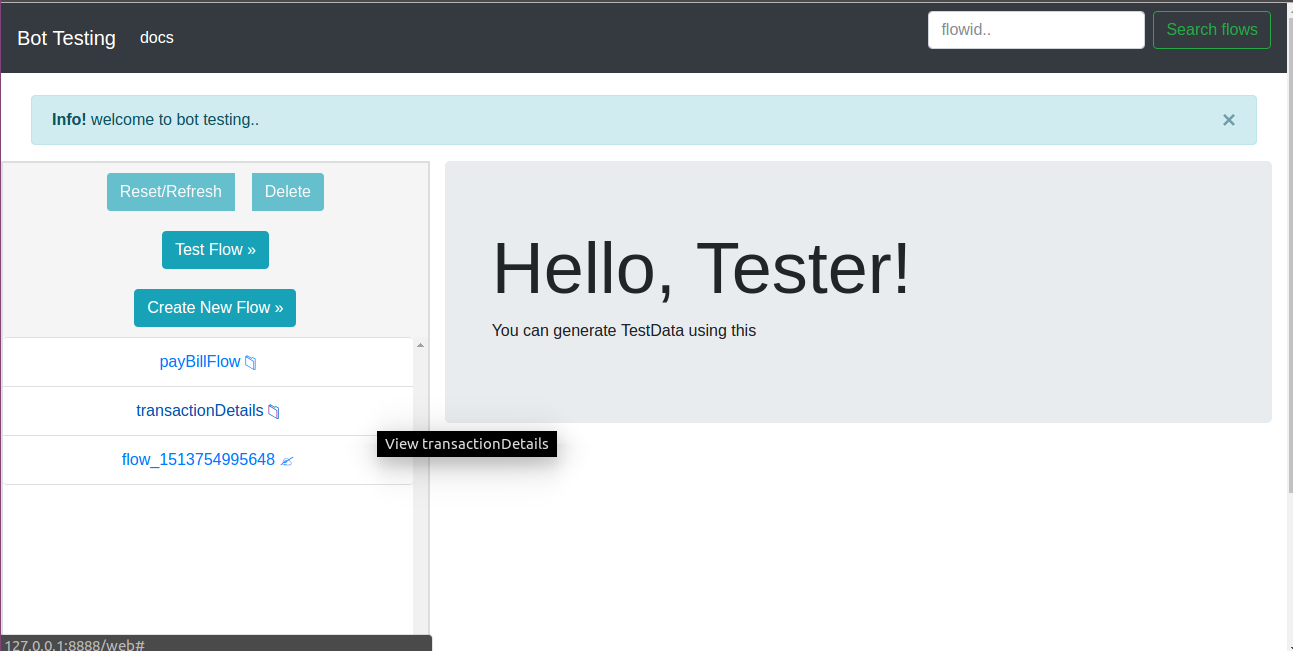
The above page showing welcome messages and some buttons in left side
- Reset/Refresh : used to reset the active flow / reload the webpage.
- Delete : used to delete an active flow.
- Test Flow : used to test active flow.
- Create New Flow : it is used to create a flow and save the flow as testData.
- flowIds List : it display all list of flow available in testData.
- clicking which we can able to modify flowInfo and test the flow
- we can see if flow is saved in testData or not by icon
- 📁 : this icon shows flow is already saved in testData
- ✍️ : this icon shows flow is not saved in testData
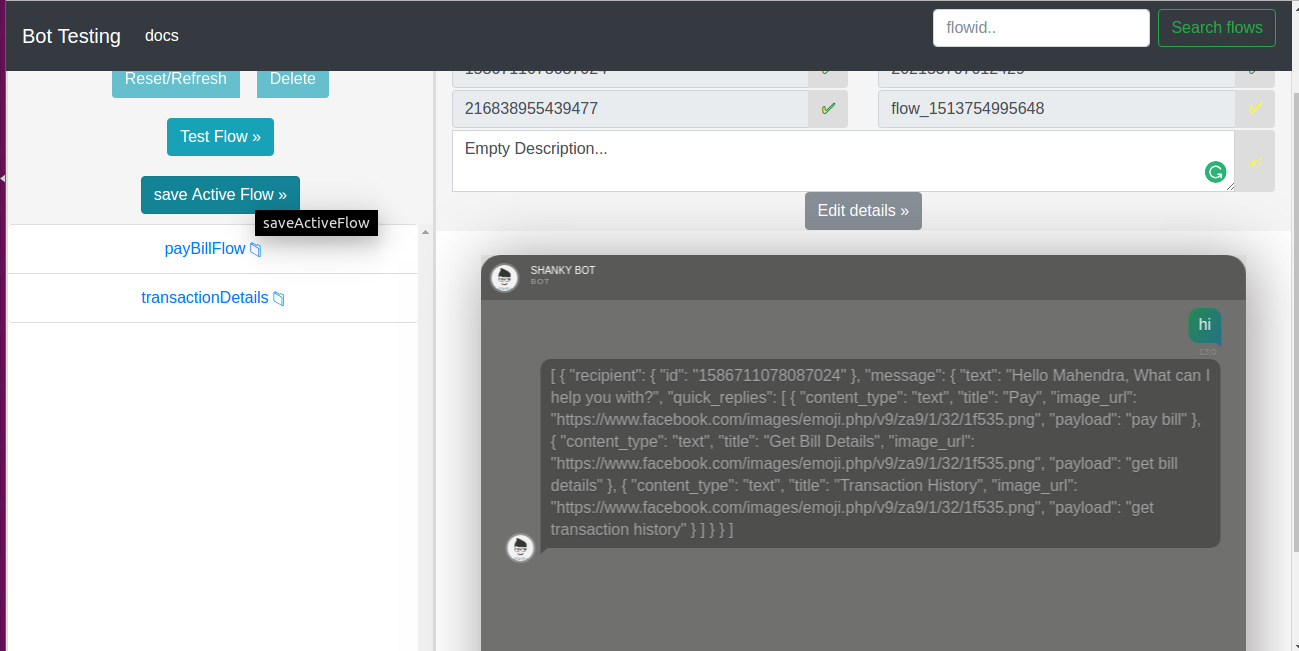
- to save it click on edit Details then update Details then save Active Flow
- to delete it click on Delete
creating a new flow
In order to create new flow by clicking on Create New Flow button as shown below
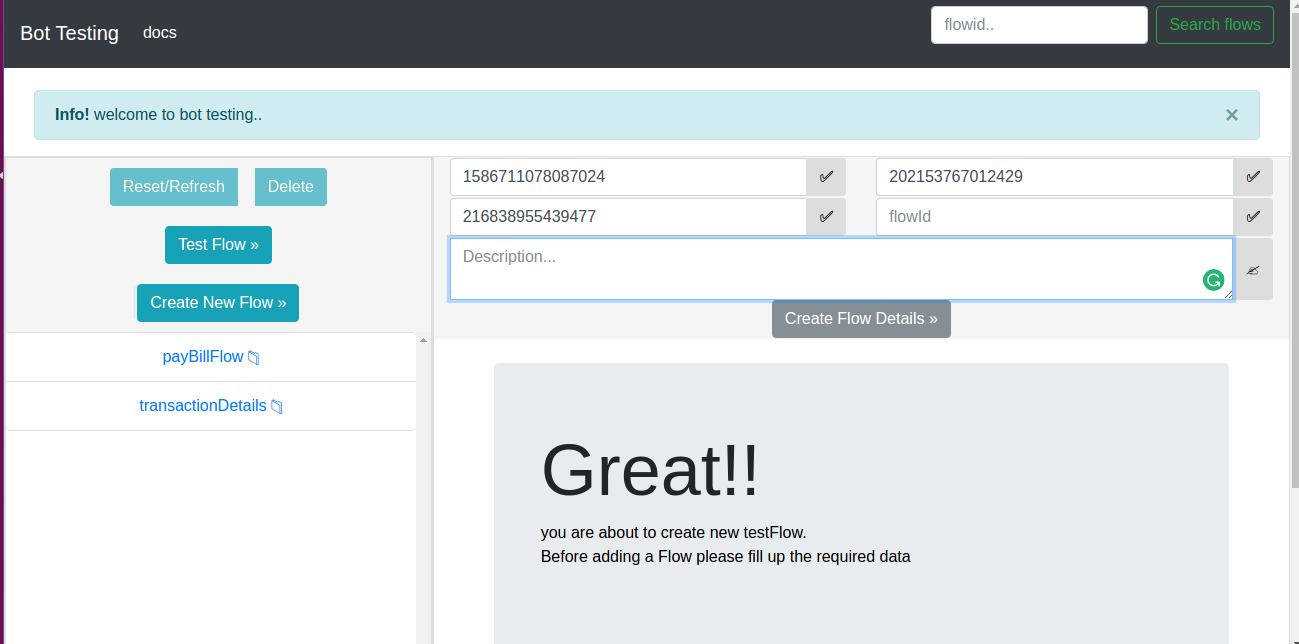
fill the required information to create a flowDetails
appId, senderId and pageId are required fields
flowId and flowDetails are optional fields
once done with it click on Create Flow Details
you will get a chatwindow as shown below where you can send messages to generate test Data
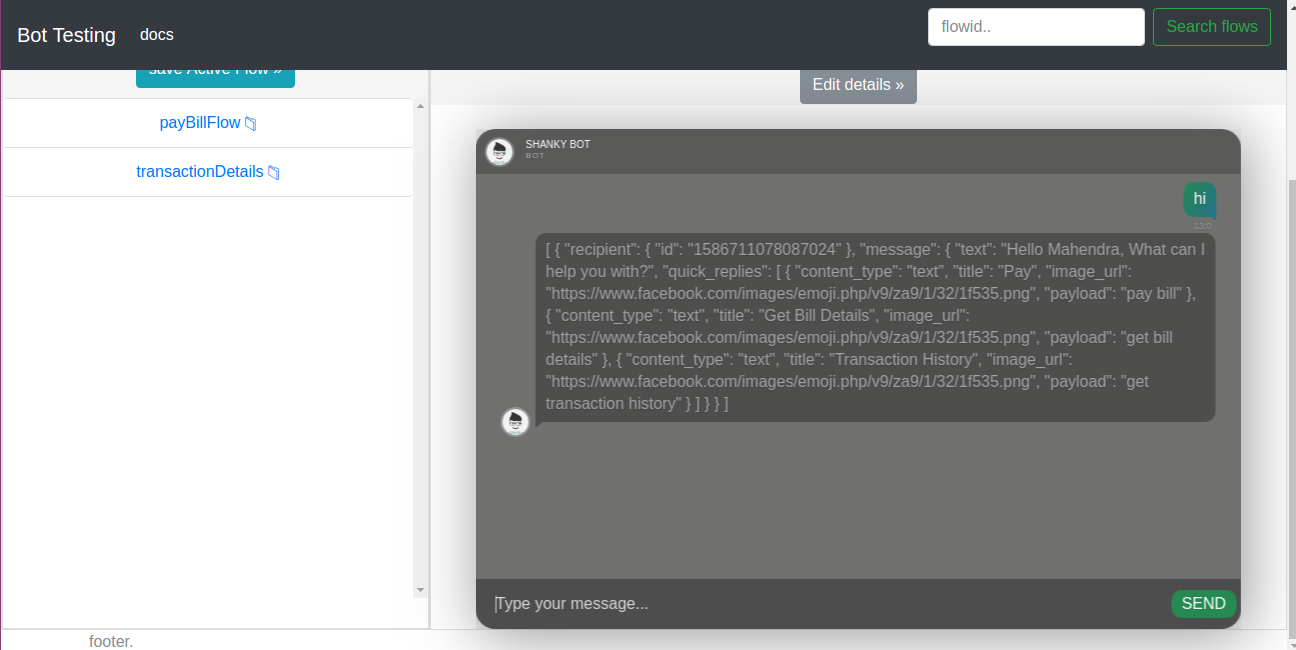
once you completed the chat you can save the testData by clicking save Active Flow
viewing saved flow details and testing
Inorder to view a particular flow click on flowId in left side as shown below
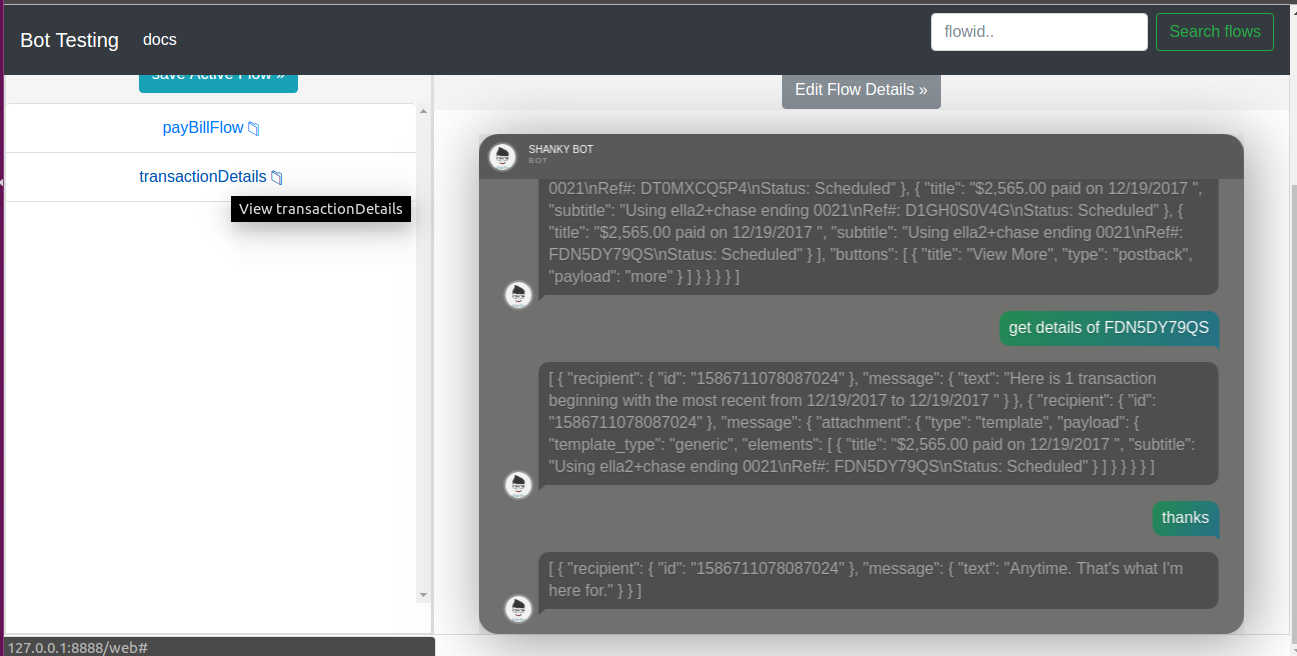
Then to test this flow click on Test Flow
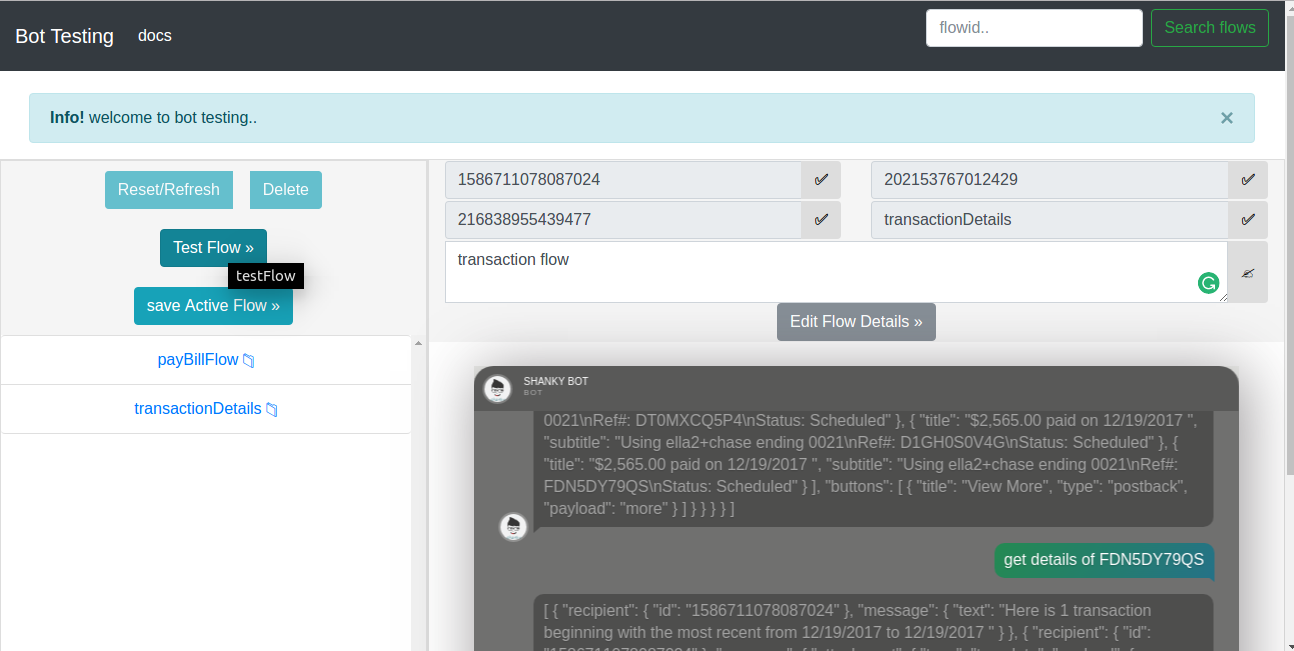
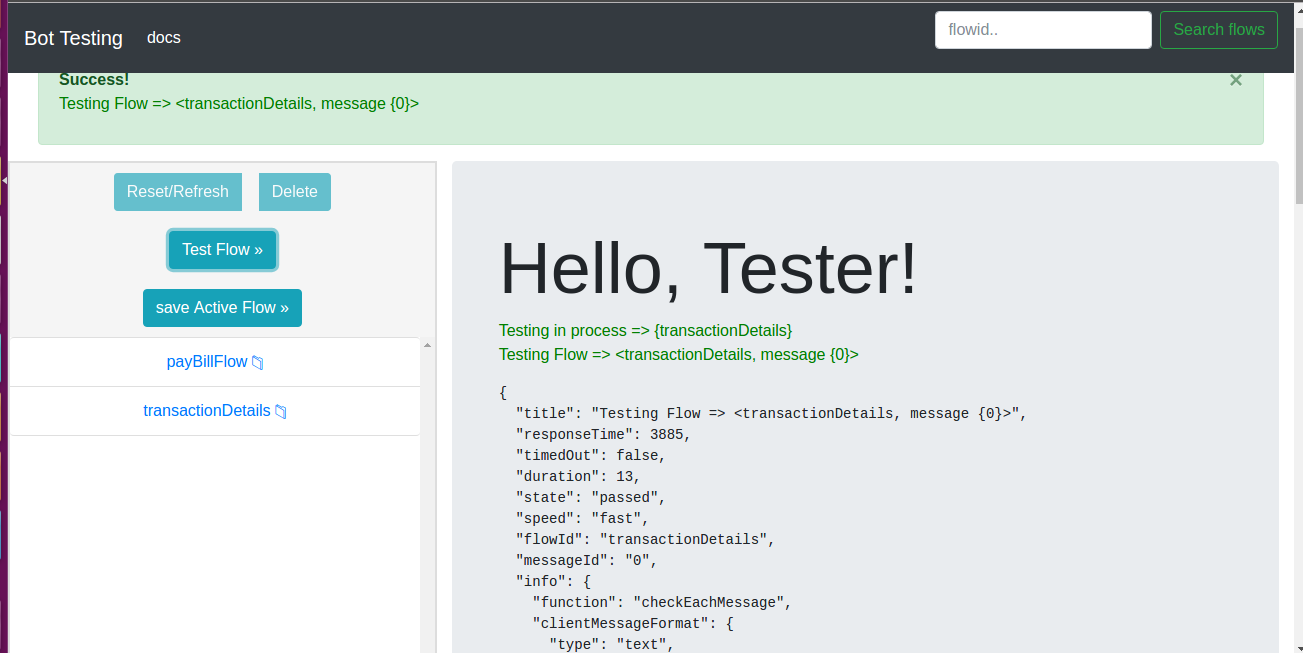
It will start testing flow showing the test status for each messages in flow as shown below
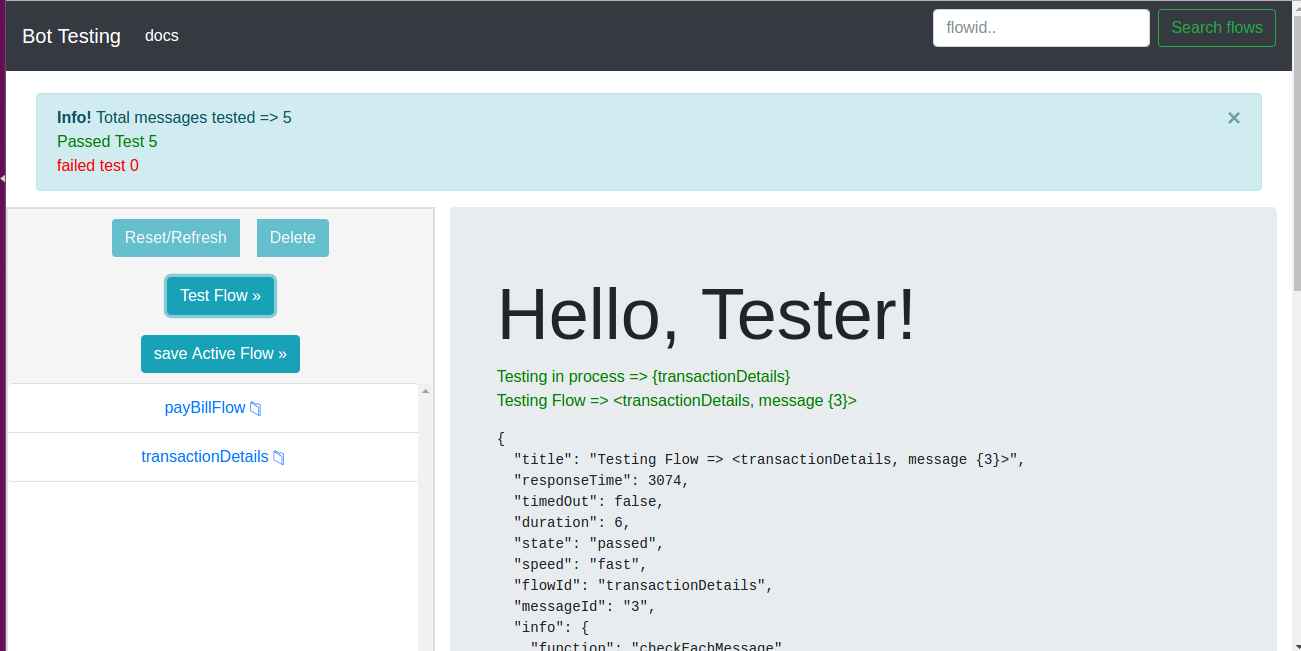
finally after ending of test it will shows the passed and faield test count as show below
Response for Each Message tested
for each messages tested we will get following JSON containing fields which is self explanatory.
{
  "title": "Testing Flow => <flow_1513768580988, message {3}>",
  "responseTime": 588,
  "timedOut": false,
  "duration": 4,
  "state": "passed",
  "speed": "fast",
  "flowId": "flow_1513768580988",
  "messageId": "3",
  "info": {
    "function": "checkEachMessage",
    "clientMessageFormat": {
      "type": "text",
      "text": "bye",
      "senderId": "1",
      "pageId": "2",
      "appId": "2"
    },
    "timeoutSet": 30000,
    "timeoutSet_": "bot may respond late so at max timeout 30 second and we are also noting responsetime",
    "responseTime": 588,
    "response": [
      {
        "recipient": {
          "id": "1"
        },
        "message": {
          "text": "Bye."
        }
      }
    ],
    "savedResponse": [
      {
        "recipient": {
          "id": "1"
        },
        "message": {
          "text": "Till next time!"
        }
      }
    ]
  }
}
Deployment
follow installation steps
Contributing
Contribute to make it more reliable and usefull for testing…
Authors
- Shankar Kumar Chaudhary